Wednesday, January 18, 2017

Quality of Line

As I've hoped was demonstrated as well as experienced in class, lines can carry themselves in a multitude of ways. They can be expressed in varying degrees of strength or fluidity, softness and violence, ambiguity and precision.

Quality of line can be thick/thin, soft/hard, long/short, straight/curved, scribbled/precise, and the list goes on. How you differentiate those lines is an experience in patience and practice, as well as understanding the subtlety of their usage.

Below are some works by some well known artists that demonstrate a diverse range of line qualities.

(Images below are sourced from this website)


Contour Line (Not Cross-Contour)

Contour line, definition:

A contour line is typically narrow and continuous, and it may vary in width to create the illusion of some parts being closer to the viewer. It marks the edge of an object or shows the border between objects in an image. Contour lines may also be used to show smaller shapes within larger ones. For example, individual facial features may be drawn in contour within a larger contour drawing of a person's head or figure.
(source)
This definition does an adequate job of describing a contour line - however, with our drawings, we want to be a bit more specific.

A contour line does indeed follow the edge of border of an object. It "traps in" the space, to create the idea that an object is contained within those lines. However, the object being defined should not cease there - we want to be proficient as well as efficient with line.

This means being able to create lines that strongly indicate the shape, volume, and surface of a form with the minimum but essential amount of lines needed to accomplish that. 

A good contour line drawing can be loose, it can be continuous, it can be gestural, it can be precise, it can be anything so long as it creates a reasonable feeling of the visual understanding of that object's qualities.

So practice!

Examples of contour line drawings, as I would like to see them from you all:


Cross-Contour Lines

Definition:
Cross-contour lines are very much an attitude about and approach to drawing. They are the lines that reflect the movement of your eye in and around what you see.

While contour lines describe edges, cross-contours describe form and volume. These lines can follow planes of form, moving around and across objects as well as through them.

Think of a topographical map--the lines move across the terrain. Cross-contour lines do the same thing.
(source)

Cross contour lines, as I've described, are as above - in addition to this, try to think of it this way:

Contour follows the outline and edges of the form, while,
Cross-Contour CROSSes over the object to contour the  surface and planes of the form.
_______________________________________________________

There are many varying ways of treading the lines in a Cross-Contour drawing.
You can vary the width of the line
You can make the line lighter
Create depth by overlapping one line to hide another
A line can be wavy
The line can be long, and gradually fade

Think about the way we expressed line in the first part of the class with the line exercises, and think about how you can bring that experience into a cross-contour drawing.
 

Examples of cross-contour line drawing:


Tuesday, January 17, 2017

Light/Dark Composition Practice

A bit late, another brought it to my attention I had yet to post an example - I was debating whether to demo this in class or to allow you to attempt without instruction.

If you wish to complete this today, feel free to do so. However, I will still being presenting to demo it tomorrow in class! I'll not be asking for it tomorrow but over the weekend instead--- After we've done a demo. If you've already attempted it, Ill hope for you to revisit and revise it, or create a new one once I explain the approach I want you to take.


The ideal practice for this assignment is to break down the geometry of the Master Copy you printed - you are to find the shapes that the shadows and the light, starting from the most basic shapes and slowly modifying your marks to include the more nuanced contours.

Here is an example found online that breaks down an image digitally from the most complex to least complex composition of light and darks:


This is a bit rough for our taste - but this is the general idea (We would create this image in reverse order, though). To find the fundamental building blocks of light and dark that exist in your image. You would then trade the image to find those shapes, darken the darks and leave the lights while indicating where they are.

You would then add mid-tones and then a gradual transition into light and dark. Eventually you have constructed a full image of the master copy, with understanding for the placement of light and dark and how those values can be observed and constructed from fundamental shapes and forms.

In any case, we will discuss this tomorrow. Remember to bring supplies mentioned in previous posts!

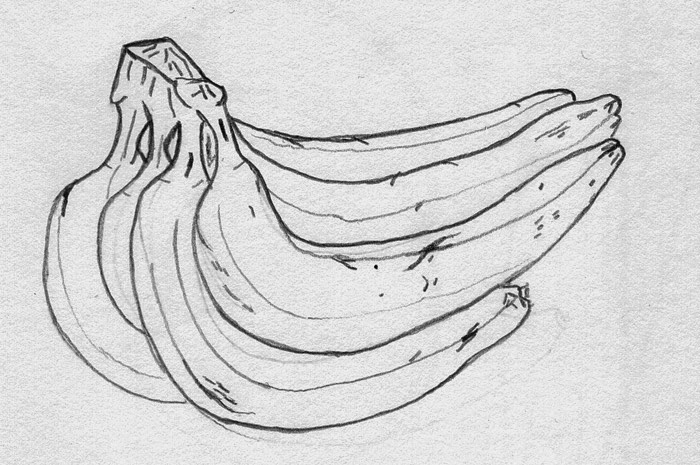
Other examples of finding light/darks:


Friday, January 13, 2017

Online guides and resources for drawing perspective - find your own, too!

The methods I teach in class are those that are an accumulation of experience, traditional education, and experimentation. However, these are my own approaches, but there are many methods to drawing.

Do not be afraid to search on your own for new ways to draw! Searches are your friends!

If there is any technique you'd like to figure out in class, let me know or post it on here, and we can discuss it during class time.

Here are some results that might help you if you're feeling behind:
Note - not meant to represent the level we are at in class, some of it is over-simplified, and is not the process we take in class. These might be more rigid in their structure of finding perspective. I would prefer that you practice the methods I teach in class, first and foremost, as those are the techniques I'll be passing on to you and I would be more familiar with how to help you learn them.

Link: One class online that has some VERY fundamental perspective exercises (not quite what approach we're taking, but good to know) 

Link: Online preview of a very rudamentary perspective guide. 

Link: Another interesting page 

Again, do not assume that this is the approach/technique we are following in class - I'm trying to teach you a more immediate, hand-eye coordination based approach. So take these links with a grain of salt. They will aid you in the course, but WE ARE NOT A PERSPECTIVE DRAWING CLASS

We are a PERCEPTUAL Drawing class. There is a difference. I want you to learn how to see!

__________

Alright, enough preaching.

Interior Spaces + Eyballing (Homework Due Wed)

Hi all, these are some examples I've found that would serve you well with your homework assignment this upcoming week. Remember your assignment:

Due Week 3
Shape Composition: Make a series of studies of interiors (3 x 4”) with or without figures. Begin each sketch with a rectangle representing the edges of your composition. Reduce the composition to its most basic shapes and lay these in before proceeding further, adjusting their forms until they make a strong design. Add smaller shapes, fitting them into those already there. Add tone or detail, retaining a strong role for the shape.

Sketchbook: Eyeballing
Practice eyeballing angles and proportions of receding rectangles, checking your measurements with the dowel technique. Remember that the farther of two equal edges will seem smaller. See if you can construct believable receding planes in your sketchbook based on the principles studied.


This assignment is meant to be similar to what we did in class, combining your use of gesture to capture the scene before you, measuring the angles and proportions using your measuring dowel (pencils, easily), and creating a realistic perspective for the space.

I want to see at least 4-5 pages FILLED (16-20 drawings, individually) with interior spaces. 


For the eyeballing exercise - I want to see you just creating receding planes and shapes in space from what you see - notebooks, boxes, tables, chairs, etc. 

Whatever is around you!

You'll be doing the same amount of these drawings as the interior spaces (4-5 pages, filled with perspective drawings of planes and geometric objects)

Do this exercise by drawing what you see as best you can, "Eyeballing" it, to capture the perspective of the objects. Then you will measure them with your dowel tool to see how closely you've managed to capture it.

Examples below, though I don't expect you to be using the perspective lines and one-point/two-point grids as these show. But this is the first step towards this!


Image result for perspective planesRelated image
Image result for perspective planes

Sunday, January 8, 2017

Visiting Artists, Spring 2017 (Opportunities for extra credit towards Final Portfolio!)

There are a total of 8 visiting artists this semester! That's a lot. It's extremely valuable as a resource.

I will be handing out a sheet with some revised information for the grading scale in this course, and it will include opportunities for extra credit in specific areas of the course assignments, should you do them.

And you should!

I've attached a link below that will show you the visiting artists this semester, which you might sit down to listen to them and learn from their experiences.

Lecture Series for the Spring 2017 Semester, Lineup

Arthur Ou will be speaking this upcoming Friday. 

Thursday, January 5, 2017

Readings for class

Here is a copy of the text we will be using for the readings - Please print it out, if possible, at the library or elsewhere to have it handy as a reference!

Drawing From Observation : Pages 1-70

Chapters 1-6 should be available in this PDF. Read them!

Lecture 1 : What Is Drawing?

 Here's the link to the first lecture: What is Drawing?


 It's a pretty basic discussion, I know, but it is important to sort of see that there are many ways to draw - you don't have to be a master. And masters aren't always that amazing, either! Their mastery came from their learned ability to disassemble and view the world in a way that exposed the rest of the world to new concepts. It's a fairly accessible realm, nowadays, but it is still valuable to reflect on where those views and concepts came from. 

So don't expect yourself to be some master figure painter or draftsmen just from day one - you hands have to adapt what your mind sees, which is the hardest part! 

Start looking at things and breaking down how you see it, the skills will come naturally after that.

If you see any artists you like, or techniques that interest you, post them here and share it so we can all benefit!

What do you want to learn, most of all?

https://s-media-cache-ak0.pinimg.com/originals/99/46/2f/99462f5368d72645d0059427d47ac4aa.jpg

What expectations do you have of this course?

If you came out from this course, what specifically do you feel would benefit you to learn?

Write in the comments.

Wednesday, January 4, 2017

Welcome!

Hi all, I'll be posting information and updates through this page for you to access. Please email me if you have any technical issues that are not related to the website itself, but to the files or images I upload for you.

See you in class!